Document Module
Overview
The Document Module is designed to showcase and manage documents or files through a configurable and responsive interface. This guide outlines how to create and configure a Document Module for both flat (ungrouped) and grouped document displays.
1. Document Module Creation
Click the Create a new module button to initiate the creation process. A form will appear prompting you to enter:
- Label – A short, user-friendly name for your module.
- Type – Select
"Document"from the type options. - ID – Auto-filled from label (used in URL paths; must contain no spaces).
Note: The Label can be a short display name, while the Title (configured later) is more descriptive.
Once completed, click Create to proceed to the module configuration screen.
2. Configuration
General Configuration
In the General Configuration section, you can set:
- Label – Short identifier for the module (editable).
- Title – Descriptive name shown in the portal.
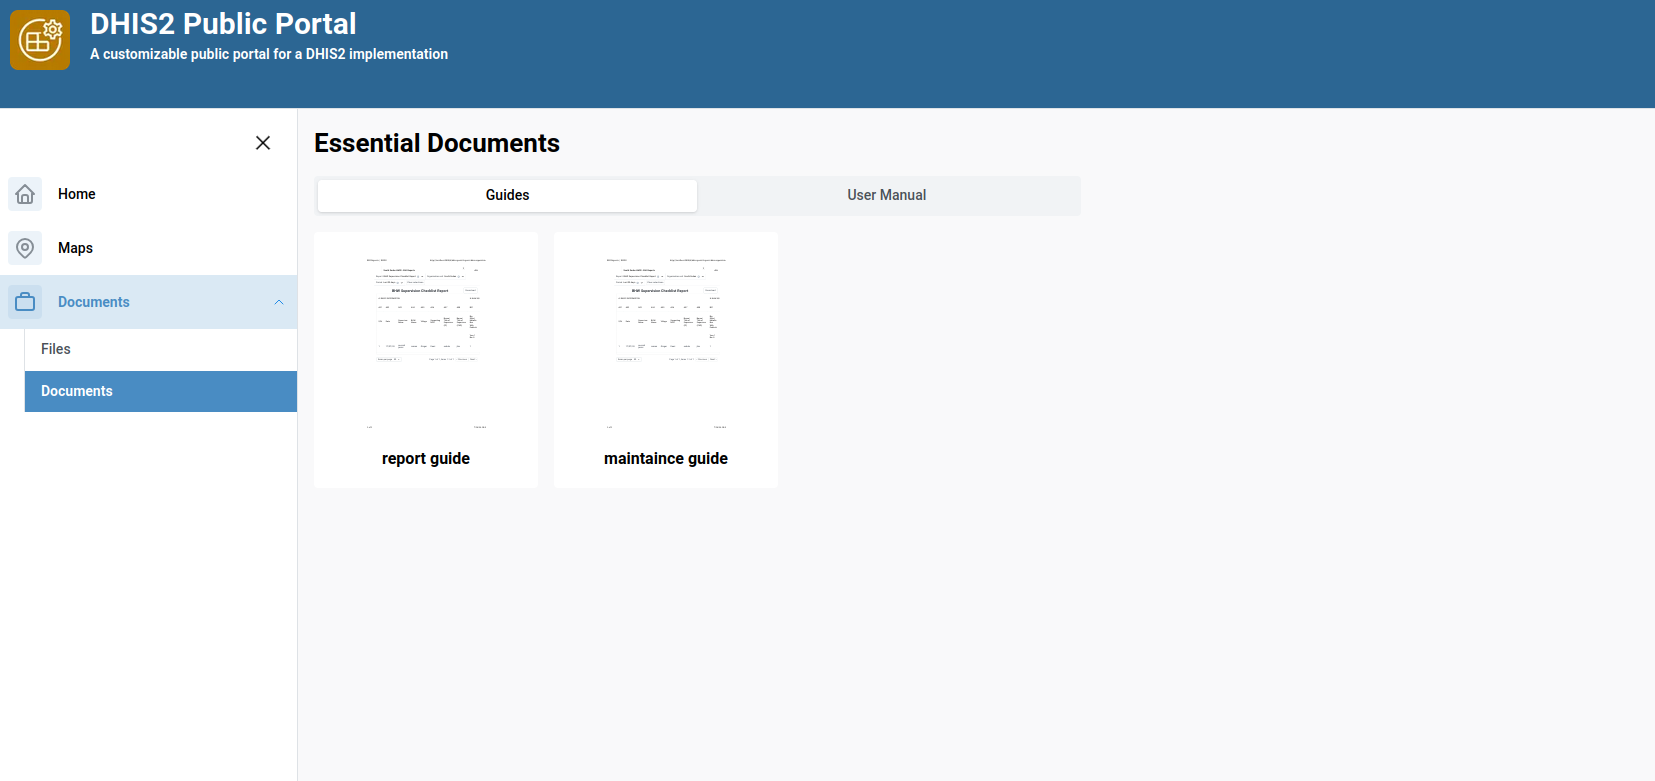
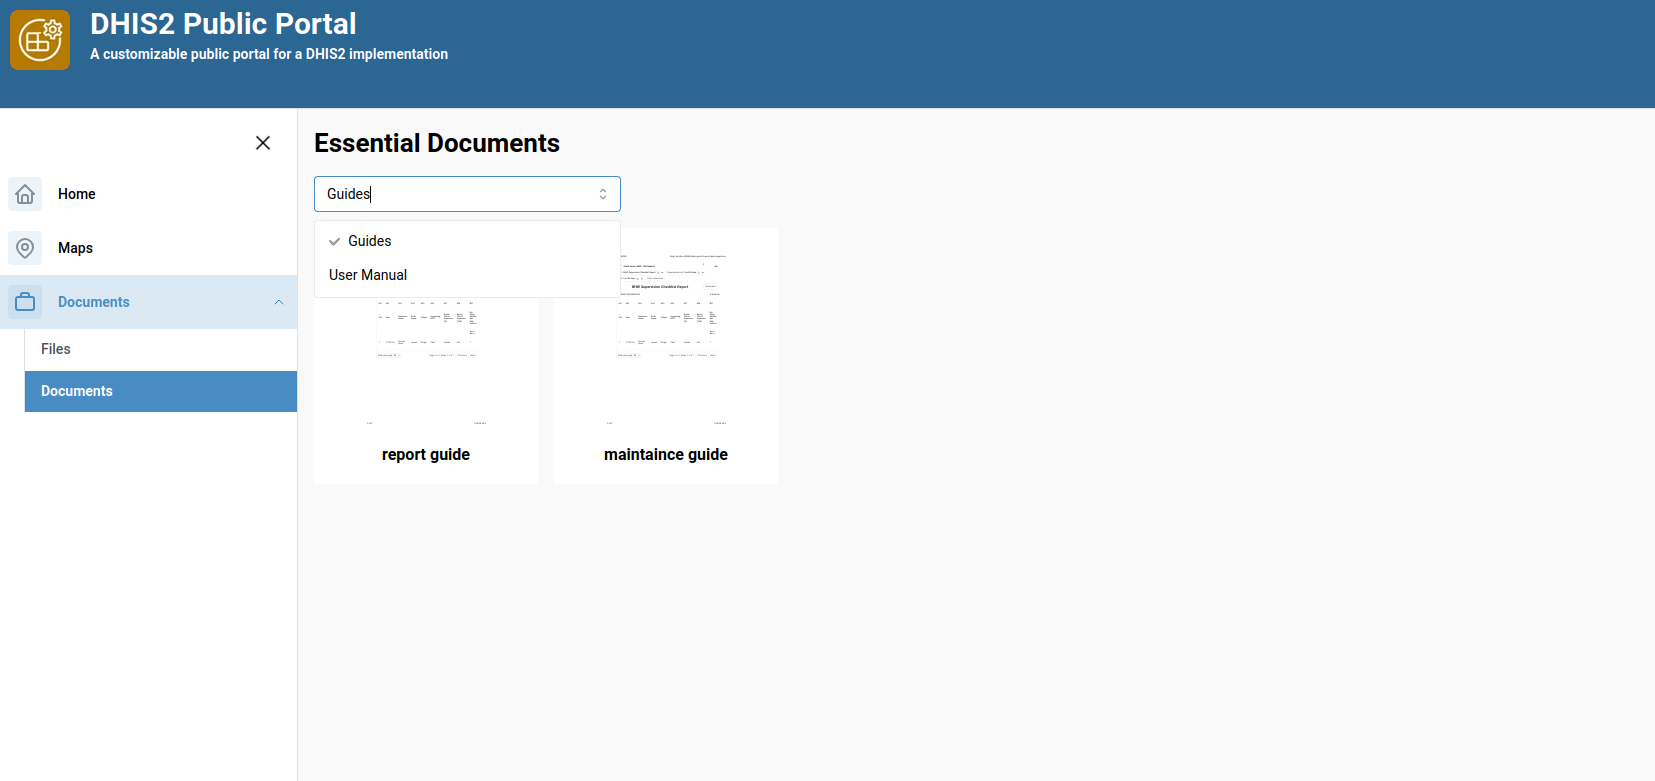
- Item Display – How grouped documents are displayed:
- Segmented
- Dropdown
Example of segmented display:
Example of Dropdown display
- Categorize documents into groups – Toggle for grouping documents.
- Unchecked (Flat Mode): Documents are listed directly.
- Checked (Grouped Mode): Documents are organized into groups.
3. Flat Configuration (When 'Categorize documents into groups' is Unchecked)
When Categorize documents into groups is unchecked, the module behaves in a flat mode. You will see:
- A button labeled Add Document
- A list of documents added to the module if any
Adding a Document
Click Add Document to open the document form. Fill in the following fields:
- Label – Name of the document
- ID – Auto-filled from label (used for URL)
- File Type – Currently only PDF is supported
- Upload File – Select and upload the PDF file
You can add multiple documents. Each added document will appear in the list below.
4. Grouped Configuration (When 'Categorize documents into groups' is Checked)
When Categorize documents into groups is checked, the module allows organizing documents into user-defined groups.
Adding a Group
Click the + Add Group button. A form will appear where you provide:
- Group Title – Display name for the group
- ID – Auto-generated from the title
After group creation, a new section appears allowing you to add documents to that group.
Adding Files to a Group
Within each group, click Add File. Fill in:
- Label – Name of the document
- File Type – PDF only
- Upload File – Choose the document file
You can add multiple files before saving the group.
Group Creation Modal:
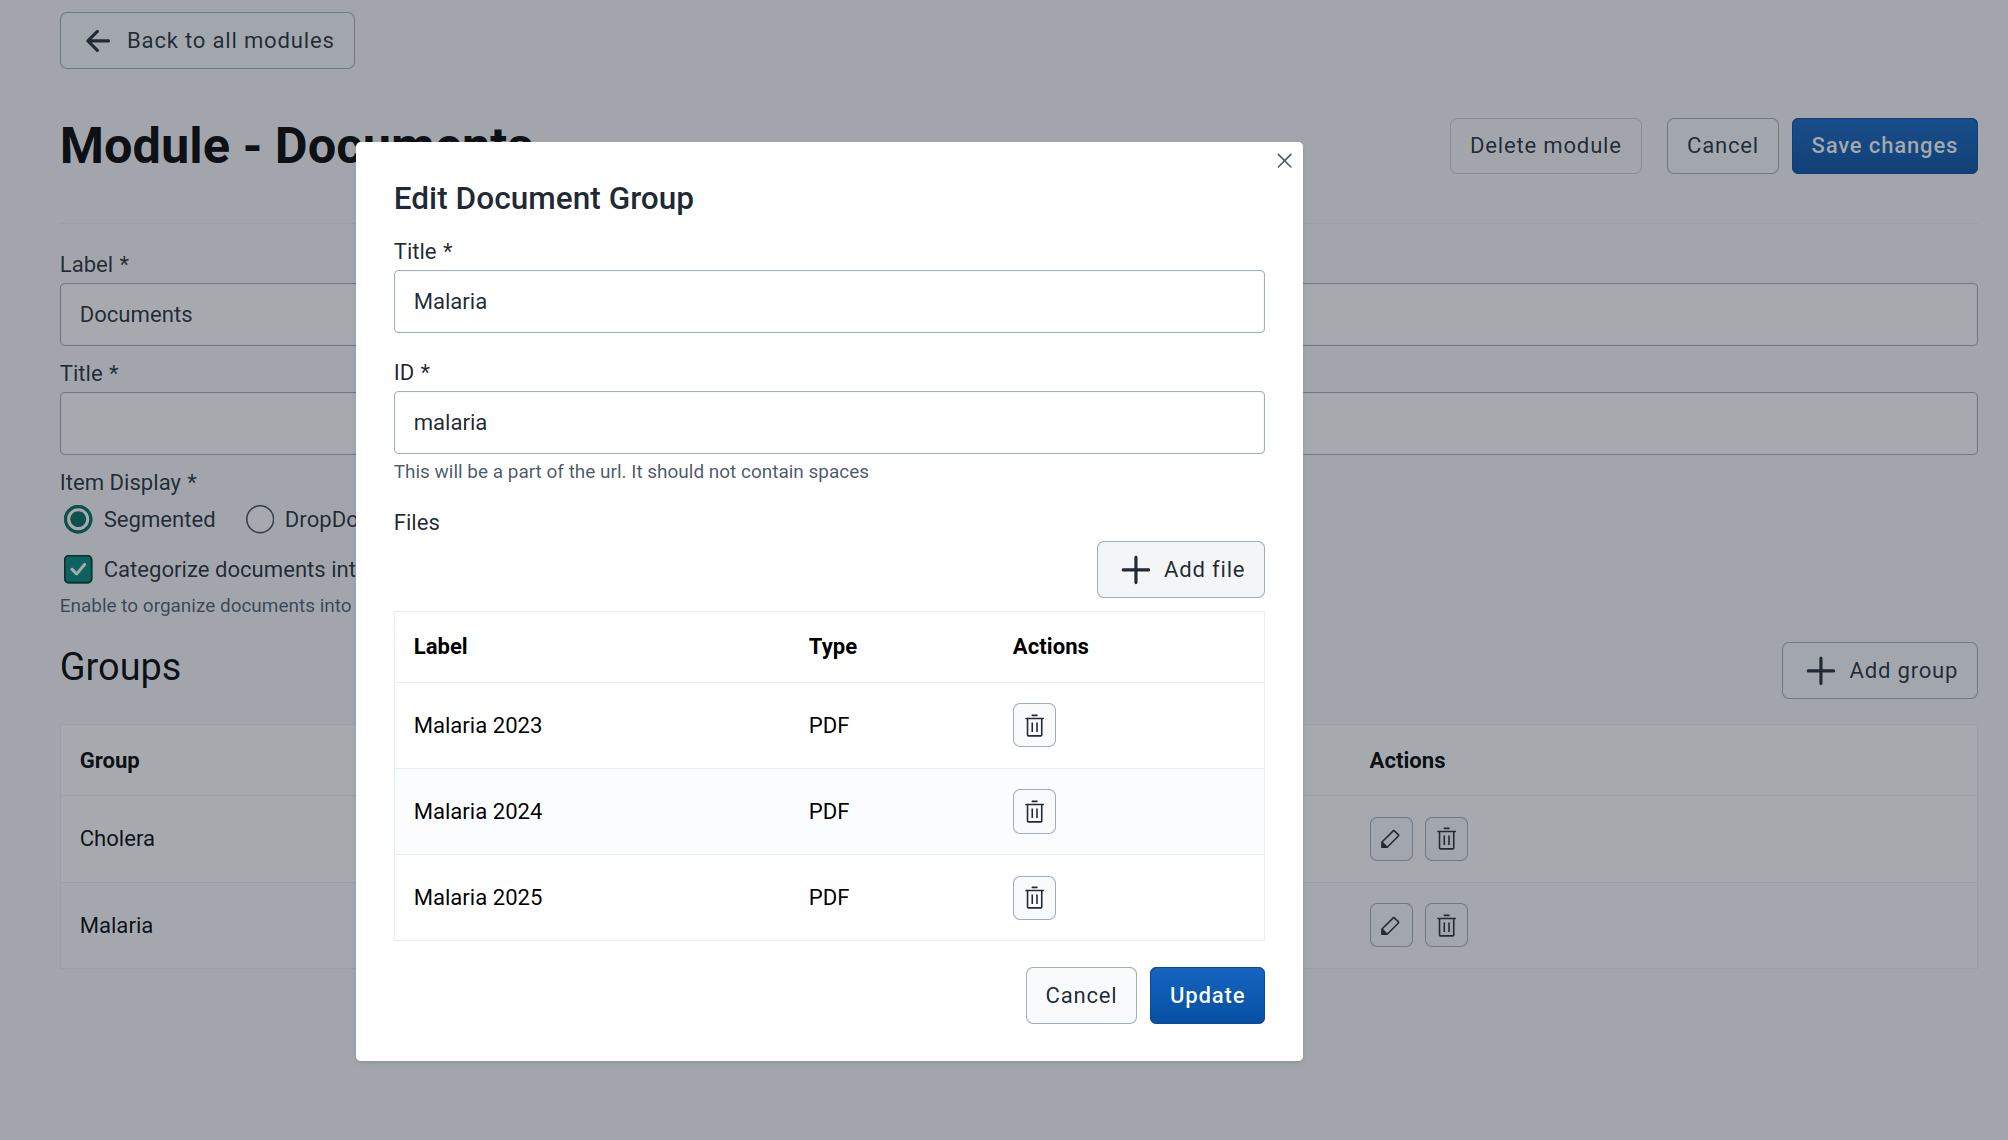
Once saved, the group and its files will appear below.
5. Deleting or Saving a Module
At the top of the module page, you will find buttons to:
- Save Changes – Save all configuration updates
- Delete Module – Remove the entire module and its contents
⚠️ Warning: Deleting a module permanently removes all files and groups associated with it.
6. Summary
| Feature | Description |
|---|---|
| Create Module | Define label, type (Document), and ID |
| Item Display | Choose between Segmented or Dropdown view for grouped documents |
| Flat Mode | List of documents without grouping |
| Grouped Mode | Organize documents into titled groups |
| Add/Edit/Delete | Full CRUD support for files and groups |
| PDF Support Only | Currently supports only PDF file type |
7. Best Practices
- Use URL-safe IDs with no spaces or special characters.
- Organize documents into meaningful groups when grouping is enabled.
- Save your progress frequently.
- Preview your display modes (Segmented vs Dropdown) for usability.
💡 Got ideas or suggestions? Reach out to the team to request new features!